
1. History

Hey rookie! So you decided to dive into this wonderful world known as Linux? It’s gonna be a beautiful and enjoyable road ahead! My name is Penguin Pete and I’m here to guide you through this journey. Let’s get started with a little bit of backstory about Linux.
To learn about how Linux came to be, let’s go back to the beginning to 1969 where Ken Thompson and Dennis Ritchie of Bell Laboratories developed the UNIX operating system. It was later rewritten in C to make it more portable and eventually became a widely used operating system.
A decade or so later, Richard Stallman started working on the GNU (GNU is Not UNIX) project, the GNU kernel called Hurd, which unfortunately never came to completion. The GNU General Public License (GPL), a free software license, was also created as a result of this.
The kernel is the most important piece in the operating system. It allows the hardware to talk to the software. It also does a whole lot of other things, but we’ll dig into that in a different course. For now, just know that the kernel controls pretty much everything that happens on your system.
During this time other efforts such as BSD, MINIX, etc were developed to be UNIX like-systems. However, one thing that all these UNIX like-systems had in common was the lack of a unified kernel.
Then in 1991, a young fellow named Linus Torvalds started developing what we now know today as the Linux kernel.
2. Choosing a Linux Distribution
In the previous lesson, we learned about the Linux kernel which powers millions of devices a day. One thing before we move forward, the term Linux is actually quite a misnomer, since it actually refers to the Linux kernel. However, many distributions use the Linux kernel so therefore are commonly known as Linux operating systems.
A Linux system is divided into three main parts:
- Hardware – This includes all the hardware that your system runs on as well as memory, CPU, disks, etc.
- Linux Kernel – As we discussed above, the kernel is the core of the operating system. It manages the hardware and tells it how to interact with the system.
- User Space – This is where users like yourself will be directly interacting with the system.
So the first step we’ll need to take is to install Linux on your machine. You have many options to choose from and this course will help inform you and get you started on choosing a Linux distribution.
There are many Linux distributions to choose from, we’ll just go over the most popular options.
4. Red Hat Enhttps://en.wikipedia.org/wiki/Red_Hat_Enterprise_Linuxterprise Linux

Overview
Red Hat Enterprise Linux commonly referred to as RHEL is developed by Red Hat. RHEL has strict rules to restrict free re-distribution although it still provides source code for free.
Package Management
RHEL uses a different package manager than Debian, RPM package manager, which we will eventually learn about as well.
Configurability
RHEL-based operating systems will differ slightly from the Debian-based operating systems, most noticeably in package management. If you decide to go with RHEL it’s probably best if you know you’ll be working with it.
Uses
As described by the name it’s mostly used in enterprise, so if you need a solid server OS this would be a good one.
5. Ubuntu

Overview
One of the most popular Linux distributions for personal machines is Ubuntu. Ubuntu also releases its own desktop environment manager Unity by default.
Package Management
Ubuntu is a Debian-based operating system developed by Canonical. So it uses a core Debian package management system.
Configurability
Ubuntu is a great choice for a beginner who wants to get into Linux. Ubuntu offers ease of use and a great user interface experience that has led to its wide adoption. It’s widely used and supported and is most like other operating systems like OSX and Windows in terms of usability.
Uses
Great for any platform, desktop, laptop and server.
1. The Shell
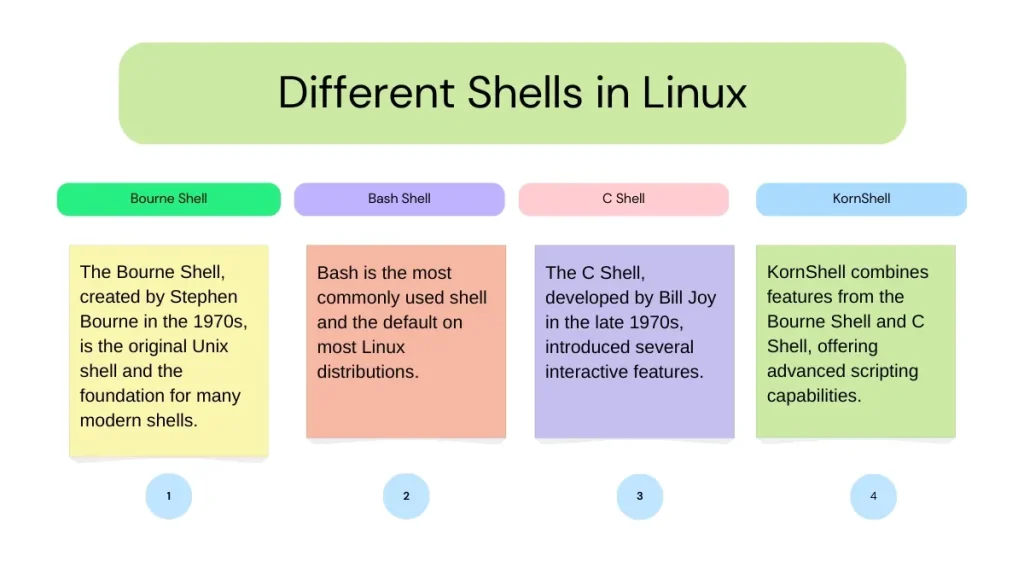
Linux shell types-
Linux Comman Commands-
The world is your oyster, or really the shell is your oyster. What is the shell? The shell is basically a program that takes your commands from the keyboard and sends them to the operating system to perform. If you’ve ever used a GUI, you’ve probably seen programs such as “Terminal” or “Console” these are just programs that launch a shell for you. Throughout this entire course we will be learning about the wonders of the shell.
In this course we will use the shell program bash (Bourne Again shell), almost all Linux distributions will default to the bash shell. There are other shells available such as ksh, zsh, tsch, but we won’t get into any of those.
Let’s jump right in! Depending on the distribution your shell prompt might change, but for the most part it should adhere to the following format:
username@hostname:current_directory

pete@icebox:/home/pete $
Notice the $ at the end of the prompt? Different shells will have different prompts, in our case the $ is for a normal user using Bash, Bourne or Korn shell, you don’t add the prompt symbol when you type the command, just know that it’s there.
Let’s start with a simple command, echo. The echo command just prints out the text arguments to the display.
$ echo Hello World
2. pwd (Print Working Directory)
Everything in Linux is a file, as you journey deeper into Linux you’ll understand this, but for now just keep that in mind. Every file is organized in a hierarchical directory tree. The first directory in the filesystem is aptly named the root directory. The root directory has many folders and files which you can store more folders and files, etc. Here is an example of what the directory tree looks like:
/

|-- bin

|   |-- file1

|   |-- file2

|-- etc

|   |-- file3

|   `-- directory1

|       |-- file4

|       `-- file5

|-- home

|-- var
The location of these files and directories are referred to as paths. If you had a folder named home with a folder inside of it named pete and another folder in that folder called Movies, that path would look like this: /home/pete/Movies, pretty simple huh?
Navigation of the filesystem, much like real life is helpful if you know where you are and where you are going. To see where you are, you can use the pwd command, this command means “print working directory” and it just shows you which directory you are in, note the path stems from the root directory.
$ pwd
Where are you? Where am I? Give it a try.
3. cd (Change Directory)
Now that you know where you are, let’s see if we can move around the filesystem a bit. Remember we’ll need to navigate our way using paths. There are two different ways to specify a path, with absolute and relative paths.
- Absolute path: This is the path from the root directory. The root is the head honcho. The root directory is commonly shown as a slash. Every time your path starts with / it means you are starting from the root directory. For example, /home/pete/Desktop.
- Relative path: This is the path from where you are currently in filesystem. If I was in location /home/pete/Documents and wanted to get to a directory inside Documents called taxes, I don’t have to specify the whole path from root like /home/pete/Documents/taxes, I can just go to taxes/ instead.
Now that you know how paths work, we just need something to help us change to the directory we want to. Luckily, we have cd or “change directory” to do that.
$ cd /home/pete/Pictures
So now I’ve changed my directory location to /home/pete/Pictures.
Now from this directory I have a folder inside called Hawaii, I can navigate to that folder with:
$ cd Hawaii
Notice how I just used the name of the folder? It’s because I was already in /home/pete/Pictures.
It can get pretty tiring navigating with absolute and relative paths all the time, luckily there are some shortcuts to help you out.
- . (current directory). This is the directory you are currently in.
- .. (parent directory). Takes you to the directory above your current.
- ~ (home directory). This directory defaults to your “home directory”. Such as /home/pete.
- – (previous directory). This will take you to the previous directory you were just at.
$ cd .

$ cd ..

$ cd ~

$ cd -
Give them a try!
4. ls (List Directories)
Now that we know how to move around the system, how do we figure out what is available to us? Right now it’s like we are moving around in the dark. Well, we can use the wonderful ls command to list directory contents. The ls command will list directories and files in the current directory by default, however you can specify which path you want to list the directories of.
$ ls

$ ls /home/pete
ls is a quite useful tool, it also shows you detailed information about the files and directories you are looking at.
Also note that not all files in a directory will be visible. Filenames that start with . are hidden, you can view them however with the ls command and pass the -a flag to it (a for all).
$ ls -a
There is also one more useful ls flag, -l for long, this shows a detailed list of files in a long format. This will show you detailed information, starting from the left: file permissions, number of links, owner name, owner group, file size, timestamp of last modification, and file/directory name.
$ ls -l
pete@icebox:~$ ls -l

total 80

drwxr-x--- 7 pete penguingroup   4096 Nov 20 16:37 Desktop

drwxr-x--- 2 pete penguingroup   4096 Oct 19 10:46  Documents

drwxr-x--- 4 pete penguingroup   4096 Nov 20 09:30 Downloads

drwxr-x--- 2 pete penguingroup   4096 Oct  7 13:13   Music

drwxr-x--- 2 pete penguingroup   4096 Sep 21 14:02 Pictures

drwxr-x--- 2 pete penguingroup   4096 Jul 27 12:41   Public

drwxr-x--- 2 pete penguingroup   4096 Jul 27 12:41   Templates

drwxr-x--- 2 pete penguingroup   4096 Jul 27 12:41   Videos
Commands have things called flags (or arguments or options, whatever you want to call it) to add more functionality. See how we added -a and -l, well you can add them both together with -la. The order of the flags determines which order it goes in, most of the time this doesn’t really matter so you can also do ls -al and it would still work.
$ ls -la
5. touch
Let’s learn how to make some files. A very simple way is to use the touch command. Touch allows you to the create new empty files.
$ touch mysuperduperfile
And boom, new file!
Touch is also used to change timestamps on existing files and directories. Give it a try, do an ls -l on a file and note the timestamp, then touch that file and it will update the timestamp.
There are many other ways to create files that involve other things like redirection and text editors, but we’ll get to that in the Text Manipulation course.
6. file
In the previous lesson we learned about touch, let’s go back to that for a bit. Did you notice that the filename didn’t conform to standard naming like you’ve probably seen with other operating systems like Windows? Normally you would expect a file called banana.jpeg and expect a JPEG picture file.
In Linux, filenames aren’t required to represent the contents of the file. You can create a file called funny.gif that isn’t actually a GIF.
To find out what kind of file a file is, you can use the file command. It will show you a description of the file’s contents.
$ file banana.jpg
7. cat
We’re almost done navigating files, but first let’s learn how to read a file. A simple command to use is the cat command, short for concatenate, it not only displays file contents but it can combine multiple files and show you the output of them.
$ cat dogfile birdfile
It’s not great for viewing large files and it’s only meant for short content. There are many other tools that we use to view larger text files that we’ll discuss in the next lesson.
8. less
If you are viewing text files larger than a simple output, less is more. (There is actually a command called more that does something similar, so this is ironic.) The text is displayed in a paged manner, so you can navigate through a text file page by page.
Go ahead and look at the contents of a file with less. Once you’re in the less command, you can actually use other keyboard commands to navigate in the file.
$ less /home/pete/Documents/text1
Use the following command to navigate through less:
- q – Used to quit out of less and go back to your shell.
- Page up, Page down, Up and Down – Navigate using the arrow keys and page keys.
- g – Moves to beginning of the text file.
- G – Moves to the end of the text file.
- /search – You can search for specific text inside the text document. Prefacing the words you want to search with /
- h – If you need a little help about how to use less while you’re in less, use help.
9. history
In your shell, there is a history of the commands that you previously entered, you can actually look through these commands. This is quite useful when you want to find and run a command you used previously without actually typing it again.
$ history
Want to run the same command you did before, just hit the up arrow.
Want to run the previous command without typing it again? Use !!. If you typed cat file1 and want to run it again, you can actually just go !! and it will run the last command you ran.
Another history shortcut is ctrl-R, this is the reverse search command, if you hit ctrl-R and you start typing parts of the command you want it will show you matches and you can just navigate through them by hitting the ctrl-R key again. Once you found the command you want to use again, just hit the Enter key.
Our terminal is getting a little cluttered no? Let’s do a little cleanup, use the clear command to clear up your display.
$ clear
There that looks better doesn’t it?
While we are talking about useful things, one of the most useful features in any command-line environment is tab completion. If you start typing the beginning of a command, file, directory, etc and hit the Tab key, it will autocomplete based on what it finds in the directory you are searching as long as you don’t have any other files that start with those letters. For example if you were trying to run the command chrome, you can type chr and press Tab and it will autocomplete chrome.
10. cp (Copy)
Let’s start making some copies of these files. Much like copy and pasting files in other operating systems, the shell gives us an even simpler way of doing that.
$ cp mycoolfile /home/pete/Documents/cooldocs
mycoolfile is the file you want to copy and /home/pete/Documents/cooldocs is where you are copying the file to.
You can copy multiple files and directories as well as use wildcards. A wildcard is a character that can be substituted for a pattern based selection, giving you more flexibility with searches. You can use wildcards in every command for more flexibility.
- * the wildcard of wildcards, it’s used to represent all single characters or any string.
- ? used to represent one character
- [] used to represent any character within the brackets
$ cp *.jpg /home/pete/Pictures
This will copy all files with the .jpg extension in your current directory to the Pictures directory.
A useful command is to use the -r flag, this will recursively copy the files and directories within a directory.
Try to do a cp on a directory that contains a couple of files to your Documents directory. Didn’t work did it? Well that’s because you’ll need to copy over the files and directories inside as well with -r command.
$ cp -r Pumpkin/ /home/pete/Documents
One thing to note, if you copy a file over to a directory that has the same filename, the file will be overwritten with whatever you are copying over. This is no bueno if you have a file that you don’t want to get accidentally overwritten. You can use the -i flag (interactive) to prompt you before overwriting a file.
$ cp -i mycoolfile /home/pete/Pictures
11. mv (Move)
Used for moving files and also renaming them. Quite similar to the cp command in terms of flags and functionality.
You can rename files like this:
$ mv oldfile newfile
Or you can actually move a file to a different directory:
$ mv file2 /home/pete/Documents
And move more than one file:
$ mv file_1 file_2 /somedirectory
You can rename directories as well:
$ mv directory1 directory2
Like cp, if you mv a file or directory it will overwrite anything in the same directory. So you can use the -i flag to prompt you before overwriting anything.
mv -i directory1 directory2
Let’s say you did want to mv a file to overwrite the previous one. You can also make a backup of that file and it will just rename the old version with a ~.
$ mv -b directory1 directory2
12. mkdir (Make Directory)
We’re gonna need some directories to store all these files we’ve been working on. The mkdir command (Make Directory) is useful for that, it will create a directory if it doesn’t already exist. You can even make multiple directories at the same time.
$ mkdir books paintings
You can also create subdirectories at the same time with the -p (parent flag).
$ mkdir -p books/hemmingway/favorites
13. rm (Remove)
Now I think we have too many files, let’s remove some files. To remove files you can use the rm command. The rm (remove) command is used to delete files and directories.
$ rm file1
Take caution when using rm, there is no magical trash can that you can fish out removed files. Once they are gone, they are gone for good, so be careful.
Fortunately there are some safety measures put into place, so the average joe can’t just remove a bunch of important files. Write-protected files will prompt you for confirmation before deleting them. If a directory is write-protected it will also not be easily removed.
Now if you don’t care about any of that, you can absolutely remove a bunch of files.
$ rm -f file1
-f or force option tells rm to remove all files, whether they are write protected or not, without prompting the user (as long as you have the appropriate permissions).
$ rm -i file
Adding the -i flag like many of the other commands, will give you a prompt on whether you want to actually remove the files or directories.
$ rm -r directory
You can’t just rm a directory by default, you’ll need to add the -r flag (recursive) to remove all the files and any subdirectories it may have.
You can remove a directory with the rmdir command.
$ rmdir directory
14. find
With all these files we have on the system it can get a little hectic trying to find a specific one. Well there’s a command we can use for that, find!
$ find /home -name puppies.jpg
With find you’ll have to specify the directory you’ll be searching it, what you’re searching for, in this case we are trying to find a file by the name of puppies.jpg.
You can specify what type of file you are trying to find.
$ find /home -type d -name MyFolder
You can see that I set the type of file I’m trying to find as (d) for directory and I’m still searching by the name of MyFolder.
One cool thing to note is that find doesn’t stop at the directory you are searching, it will look inside any subdirectories that directory may have as well.
15. help
Linux has some great built-in tools to help you how to use a command or check what flags are available for a command. One tool, help, is a built-in bash command that provides help for other bash commands (echo, logout, pwd, etc).
$ help echo
This will give you a description and the options you can use when you want to run echo. For other executable programs, it’s convention to have an option called –help or something similar.
$ echo --help
Not all developers who ship out executables will conform to this standard, but it’s probably your best shot to find some help on a program.
16. man
Gee I wish some of these programs had a manual so we can see some more information about them. Well luckily they do! Aptly named man pages, you can see the manuals for a command with the man command.
$ man ls
Man pages are manuals that are by default built into most Linux operating systems. They provide documentation about commands and other aspects of the system.
Try it out on a few commands to get more information about them.
17. whatis
Whew, we’ve learned quite a bit of commands so far, if you are ever feeling doubtful about what a command does, you can use the whatis command. The whatis command provides a brief description of command line programs.
$ whatis cat
The description gets sourced from the manual page of each command. If you ran whatis cat, you’d see there is a small blurb with a short description.
18. alias
Sometimes typing commands can get really repetitive, or if you need to type a long command many times, it’s best to have an alias you can use for that. To create an alias for a command you simply specify an alias name and set it to the command.
$ alias foobar='ls -la'
Now instead of typing ls -la, you can type foobar and it will execute that command, pretty neat stuff. Keep in mind that this command won’t save your alias after reboot, so you’ll need to add a permanent alias in:
~/.bashrc
or similar files if you want to have it persist after reboot.
You can remove aliases with the unalias command:
$ unalias foobar
19. exit
Well, you sure did a good job getting through the basics. We’ve only scratched the surface, now that you’ve learned to crawl, in the next set of courses, I’m gonna teach how to walk.
For now, you can pat yourself on the back and take a break. To exit from the shell, you can use the exit command
$ exit
Or the logout command:
$ logout
Or if you are working out of a terminal GUI, you can just close the terminal, see you in the next course!
Do these practice and we will post more to learn